
If you have an iPhone, you can now unlock it by wearing a mask and not using an Apple Watch. This new Face ID feature, which has been available to beta testers for some time, reaches all users with the latest version of Apple's mobile operating system , iOS 15.4.
It took two years for the people of Cupertino to update Face ID during the pandemic and allow it to work even when part of our face is invisible. This is made possible by an innovative algorithm that can recognize the identification characteristics of the eye area. Infobae brings how to configure this new feature on the star smartphone of the bitten apple.
How to unlock your iPhone when you have a mask on
The first thing to do is make sure that you have a mobile phone that supports mask unlocking. Apple notes that the new Face ID algorithm works with any phone model in the iPhone 12 or iPhone 13 family. In fact, these devices have a more advanced TrueDepth camera system.
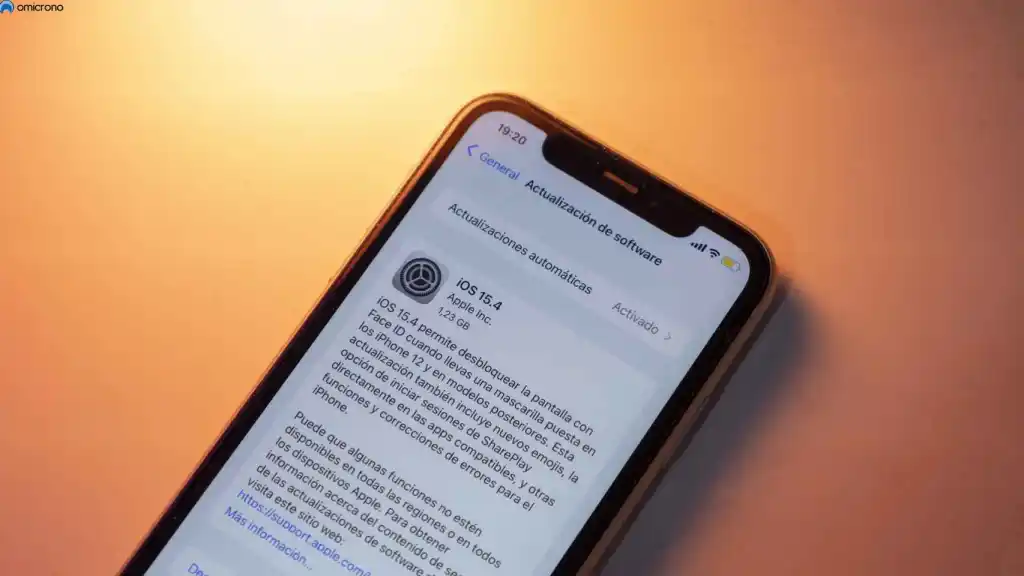
The next step is to verify that iOS 15.4 is installed. You can check which version your iPhone currently has and download the latest version in Smartphone Settings.
In this section, tap General and then Software Update. If you need to upgrade, make sure you have at least 50% battery before starting the process.
Once your mobile phone is updated, go back to Settings and tap Face ID and Password.
In this section, and only if you have a compatible iPhone, will a new option called 'Face ID with a mask' appear. Just turn on the switch and follow the steps to complete the setup.
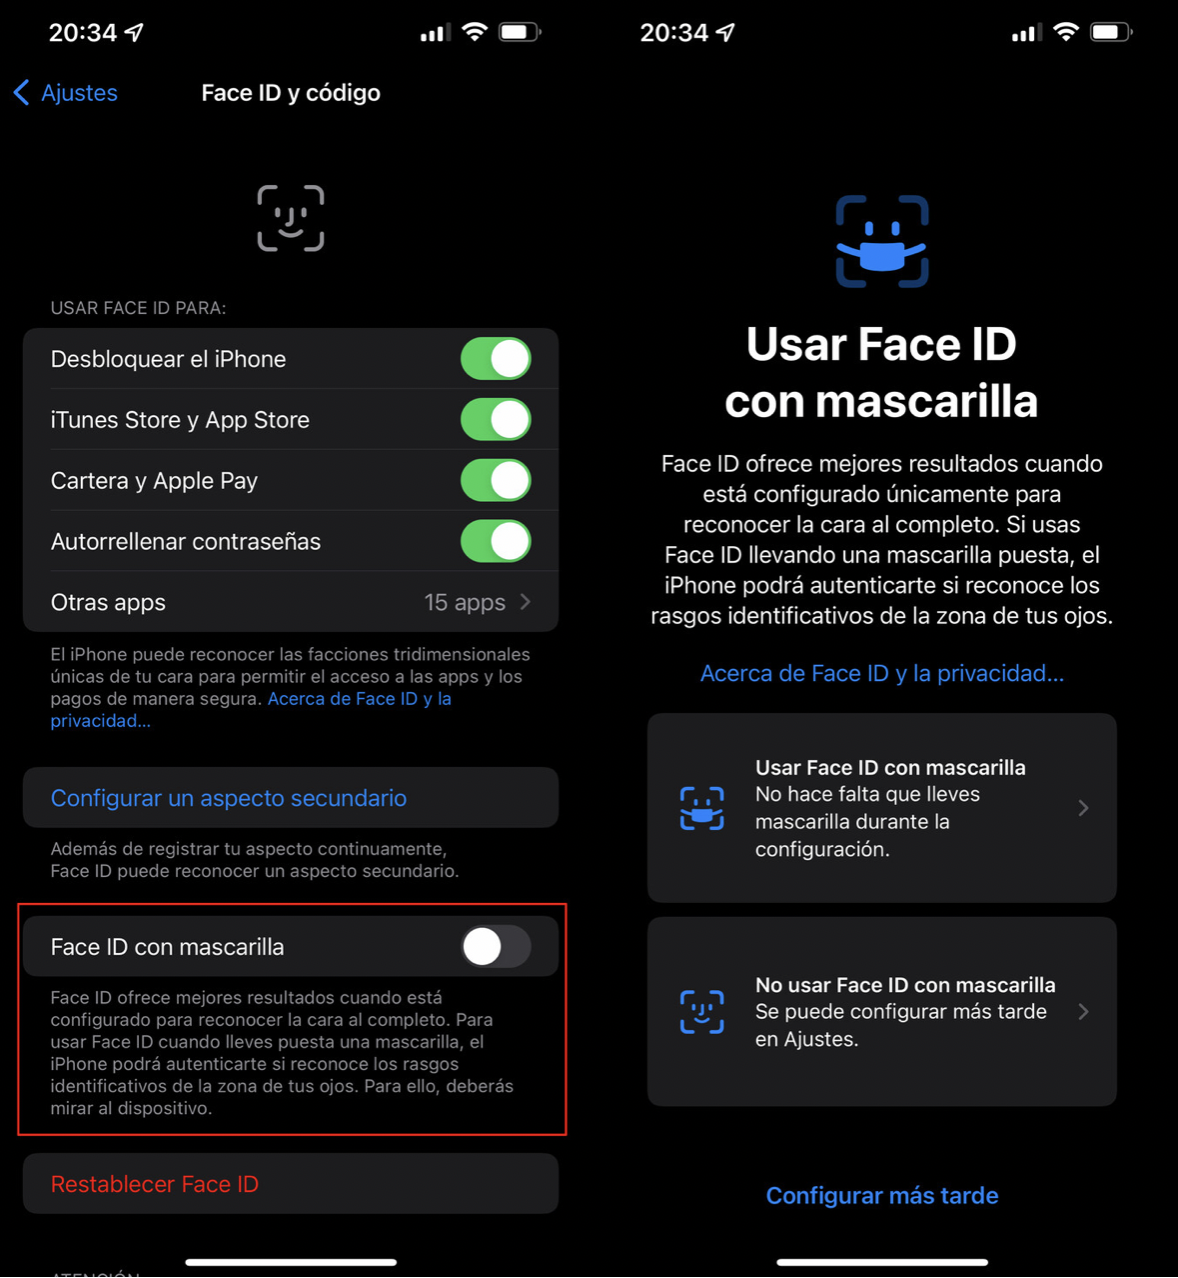
It should be noted that the system will not work with sunglasses because Face ID must read the eyes very accurately.
iOS 15.4 also comes with other features such as anti-harassment measures for AirTags, the ability to add notes to passwords that we store in iCloud, new emojis, a system called Passkey; which allows you to identify Apple users without a password in the websites that integrate it, active corner gestures in Notes and more.

How to share a screenshot as it is taken on iPhone
Taking a screenshot on the iPhone is common and very simple: you just need to press the power button and the volume up button at the same time.
To share this photo, the common way is to click on the floating thumbnail, go to the editor and click the share icon; a process that takes a series of steps and a few seconds. If you want to share the screenshot without it taking so long, then there is a way.
Since the main purpose of screenshots is to share them, and any intermediate steps removed will save a lot of work, there is a way to quickly send those screenshots without entering the editors or saving them: with a touch-and-hold gesture.
If you don't know a quick way to share iPhone screenshots, just save the following procedure to your memory:
1. Take a screenshot in the usual way: press the power and volume up buttons simultaneously.
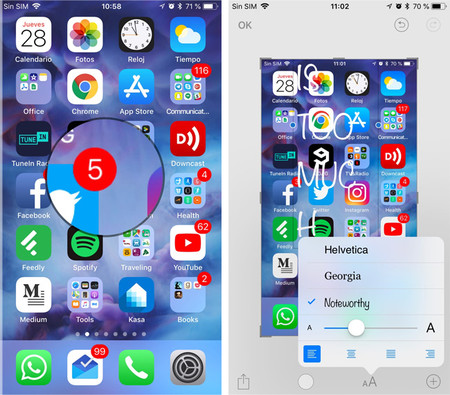
2. A screenshot thumbnail will appear in the lower right corner. Hold it down.
3. After holding your finger for half a second, iOS will remove the white border that appears on the thumbnail. Release your finger and the Share menu will appear.
4. After the screenshot is shared, you can delete it from the screen (it will be saved).
5. If you want to delete it, click once on the thumbnail (which does not disappear) and open the editor to delete it from the trash can icon.
This trick also works on iOS, iPadOS: to share iPad screenshots, you need to follow the same process. Apple introduced this cool shortcut in iOS 11.
KEEP READING
Últimas Noticias
Debanhi Escobar: they secured the motel where she was found lifeless in a cistern
Members of the Specialized Prosecutor's Office in Nuevo León secured the Nueva Castilla Motel as part of the investigations into the case

The oldest person in the world died at the age of 119
Kane Tanaka lived in Japan. She was born six months earlier than George Orwell, the same year that the Wright brothers first flew, and Marie Curie became the first woman to win a Nobel Prize

Macabre find in CDMX: they left a body bagged and tied in a taxi
The body was left in the back seats of the car. It was covered with black bags and tied with industrial tape

The eagles of America will face Manchester City in a duel of legends. Here are the details
The top Mexican football champion will play a match with Pep Guardiola's squad in the Lone Star Cup

Why is it good to bring dogs out to know the world when they are puppies
A so-called protection against the spread of diseases threatens the integral development of dogs


